Here at RobotizeIt we are slowing evolving our homes to become fully automated smart homes. This is a process of selecting and installing smart devices and pairing them with our Google Home and Samsung SmartThings systems. Amazon Alexa and other smart home controllers should also work, but for now we are focused on the Google and Samsung hubs. This process can be confusing because there are so many products on the market and not all of them are worth the effort of installation. We hope to sort out the good from the bad and let you know which are worth consideration.
Overview
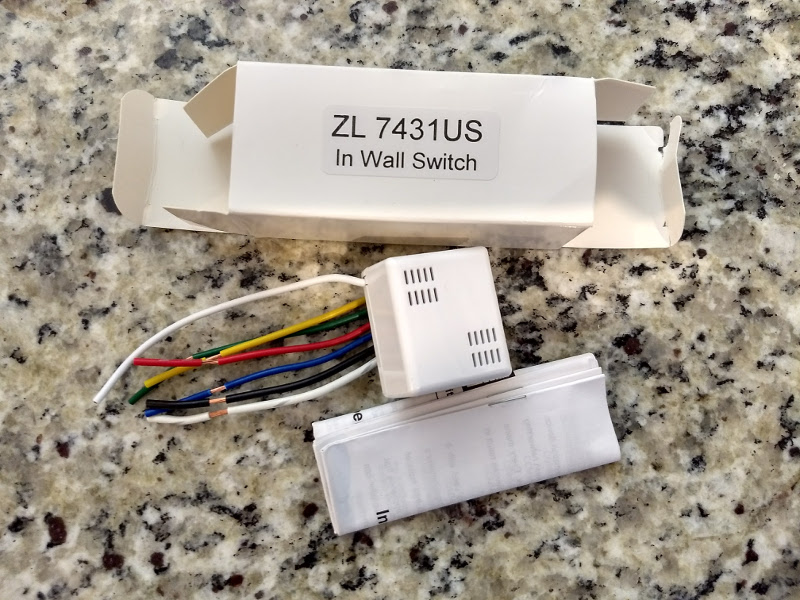
The latest product that I have purchased, installed and played with is the Vision In Wall Z-Wave Micro Switch purchased on Amazon from The Smartest House. The Vision module is interesting because it will work in a single switch, 3-way switch or switch with indicator light configurations. And the price is excellent, especially for a 3-way configuration. For under $30 you can have a Z-Wave controlled 3-way light.


I purchased the single relay module, although the double relay version is an even better value. The module is smaller than I expected, about the same diameter as a quarter and about 1⁄2 inch thick. The small size is great for smashing this into an already full wall box.
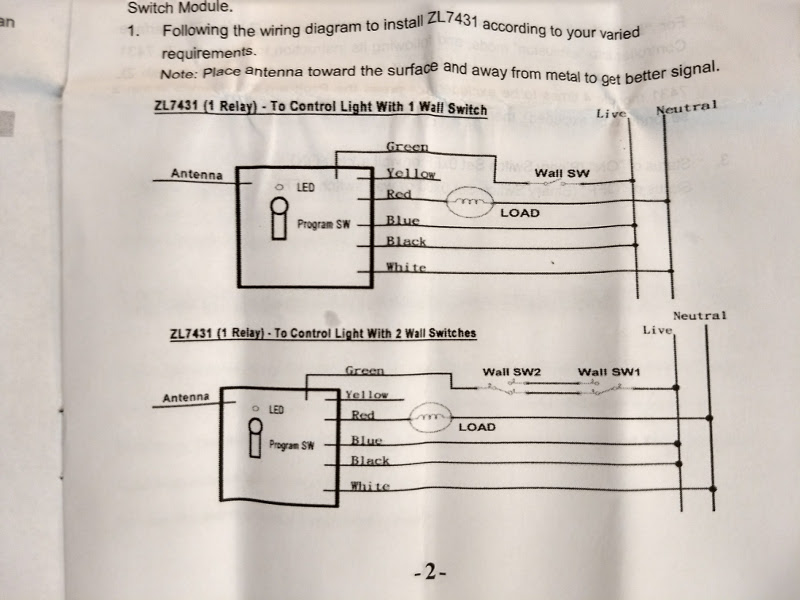
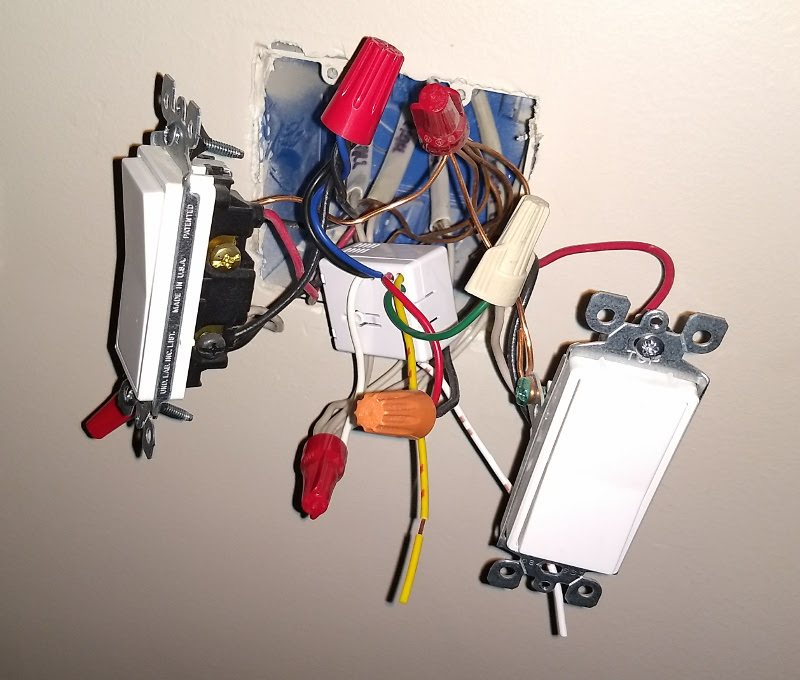
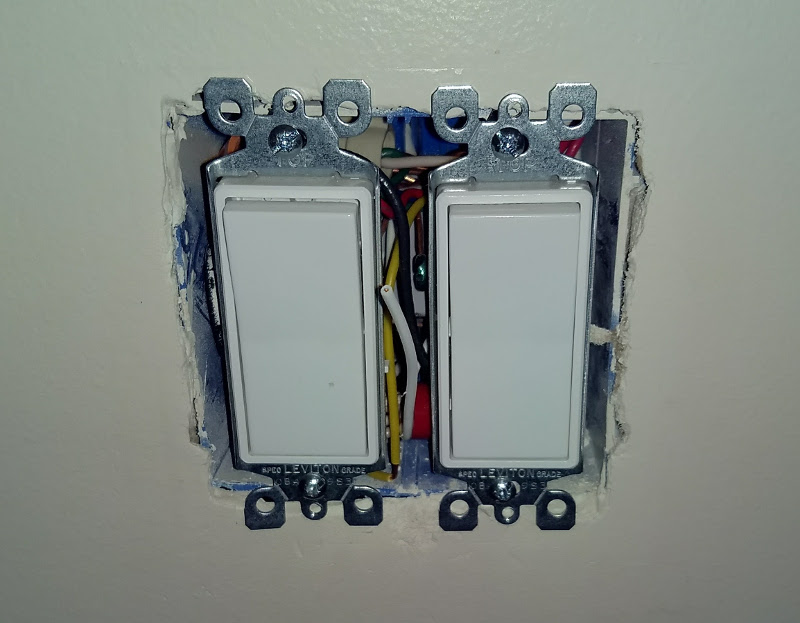
The Vision In-Wall module works works with your existing switches and is installed inside the switch box behind the existing switches. Installation is a little bit more difficult than installing a regular switch module, however the for a 3-way installation it saves some money. I installed the Vision module in a basement box to finish off the smart capabilities of a room with two banks of lights. One bank is controlled on a single Z-Wave dimmer, and the other bank is controlled by a 3-way Decora switch.
These modules are similar to most other Z-Wave in-wall devices in that they require a hot line in the box and they need to be connected to hot and neutral so they can be powered all the time. The trick for installing the 3-way module is to ensure that you have a hot line in the same box as the load line. This is where the module must be installed. As always when installing devices on mains power, make sure you turn off power at the breaker prior to performing any work. If you have any doubts as to your abilities find a friend or a professional to do the actual installation.
The module starts ups in pairing mode, I just had to simply start the SmartThings app and go to Devices then Add a Device. The hub found my switch in a few seconds and pairing was complete. I verified that the local physical switch still performed correctly and they do. Local switch actions are detected and performed almost as quickly as before the modification. The local actions have the slightest delay, it is nearly imperceptible. One nice benefit of using these in wall modules is that I prefer the solid, snappy action of normal light switches. All of the smart switches I have used feel a bit soft and have slightly less travel then the non-smart version. I prefer the snap of a regular switch and you get to keep that effect by using the modules.
I used the default device handler in SmartThings without any issues. One issue I did encounter is a situation where the device was put into some unknown mode and it flickered when transitioning to the off state. Leaving the light off for several minutes cleared up the issues and it has not returned.
Overall, my experience with the Vision In-Wall module is positive. I have used it for about two weeks now, and it has continued to work great. Unlike the previous in-wall micro switch module I tried (Enerwave RSM2), I’m happy with this one and I will keep it installed. I did encounter the flickering lights issue again, but turning it off fixed the issues again. If that problem re-occurs frequently I may regret this purchase in the future.